About

French Silver is a two person shop. Sisters, Alexia and Jennifer, work together to create everything by hand in their home workshops. This blog is a chance for them to show you a little bit of what goes on behind the scenes.

Labels

Search This Blog

Showing posts with label DIY. Show all posts

Tuesday, February 4, 2014

Pallet Shelves

simple pallet shelf

stenciled shop name

Our first show - Reynoldstown Wheelbarrow Festival 2013
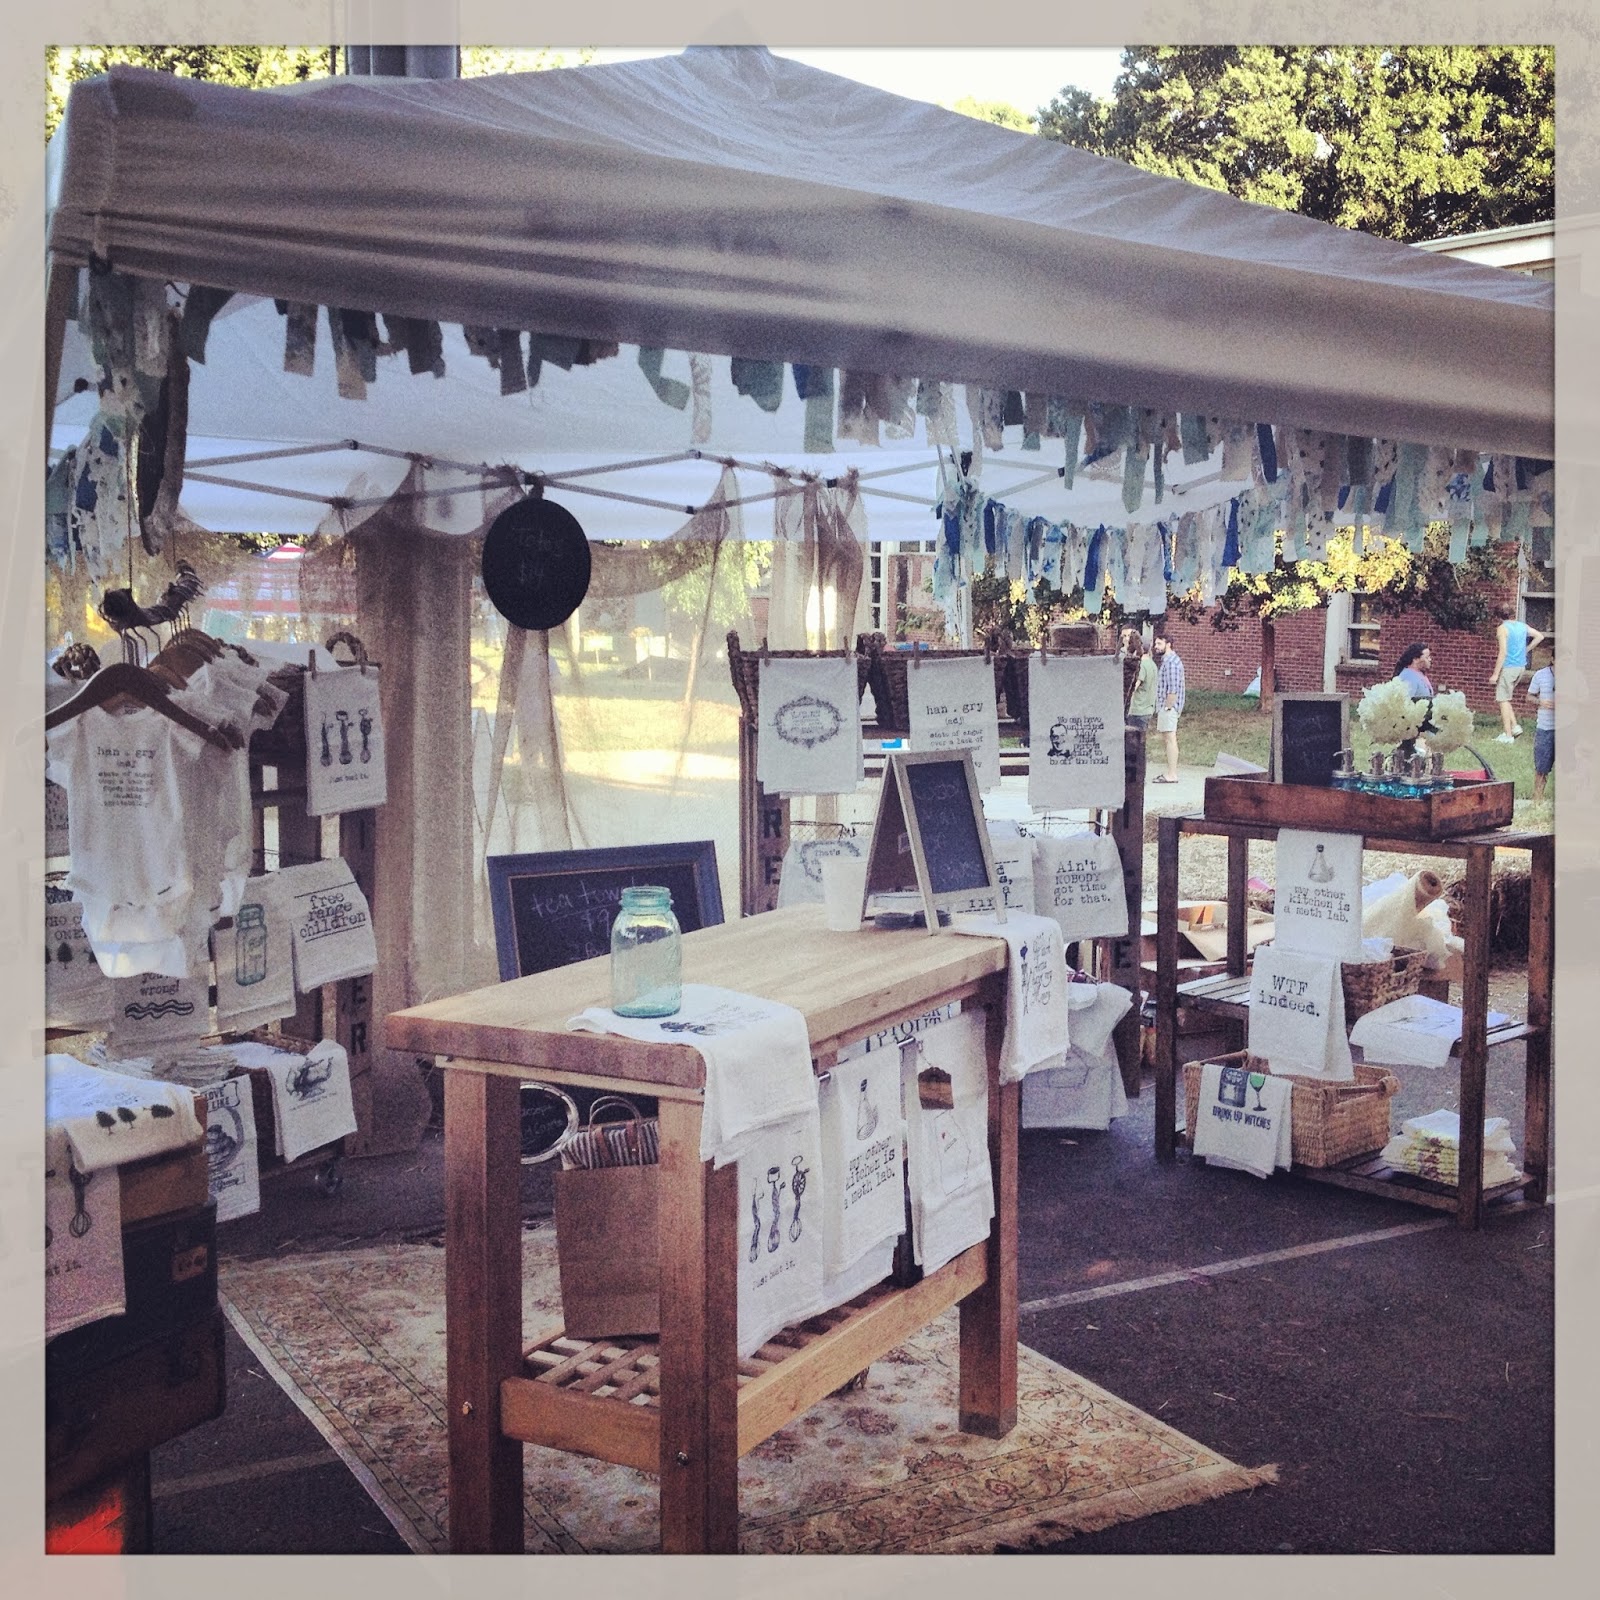
  Fall 2013 was our first time selling at festivals. We were having a hard time coming up with a way to display over 40 towel designs in a 10x10 tent.

  Thankfully, I have a handy husband who put together two shelves made from pallets.  He also added metal casters to the bottom so moving them in and out of shows would be a lot easier.  It was even his idea to stencil our shop name to the front.
Want to see our tips for festivals?  Click here.

Wednesday, January 29, 2014

DIY Paper Mache Stag Head

DIY Moss Stag Head 


Stag heads are a cool and interesting decoration, but they can cost more than $100 for nothing more than a paper mache figure.  

I'll be honest, I didn't realize what I was getting into when I started this project - It was one of the more tedious endeavors I have voluntarily took on, but rest assured, it can be done if you take your time and do it right.  On the 1 to 10 crafter intensity scale, I'd give this an 8, mostly just because of the time it takes. The up side: there's very little cost...I think mine cost me about $10 - most of the materials you'll have on hand.

What you'll need for the paper mache figure:

-Newspaper (some whole and lots cut into strips)
-Elmer's Glue
-Masking tape
-Scissors
-Wire Hangers
-Wire cutter
-Grilling skewers (the wooden kind)
-Oatmeal canister with cap
-Foil (optional)

What you'll need For the moss covering:

-SuperMoss Instant Green Moss mat
-Glue gun & lots of glue sticks

Where to begin...?

With any paper mache, before you start the messy part, you've got to have a basic form to start on.  First off, eat all that oatmeal and clean out the container - keep the top too!  You'll use the container as the neck of the deer. 
 
Cut the bottom out and then cut the container from top to bottom, making it more malleable.  Mold it into a more conical shape and tape it to stay that way.

Stuff the inside full of balled up pieces of newspaper - a mixture of large and small...you just want the whole thing filled up. The top of the container will become the base of the neck - use extra balled up newspaper to slide in between the cone and the base (or the oatmeal cap).  Next, make a snake-like figure out of newspaper.  As we all know, not all necks are perfectly conical.  Deer have a peak at the front of their necks.  Tape it on to the front of the neck shape.  Don't worry about making your figure perfectly smooth.  Remember, you're going to be adding a smooth paper mache finish over this...all you're doing right now is creating the raw shape.  

***IMPORTANT***: I didn't have the hindsight here, but I can give the advise now.  If you're planning on mounting the stag, be sure to hold your unfinished project up to the wall with the base flush with the wall.  You don't want his head hanging too low - make him look happy and regal...a low-hanging head will make him look sad and ashamed - you want your art to look the way you feel about it...proud! 

Start forming a head shape with your newspaper.  I found that this step is a lot of trial and error.  Maybe you'll have to create the snout separate from the head and tape them together.  Don't forget about your tape here either way...it's great for shaping.  Be sure to pay close attention to nostril indentations, eye contour, ears, jaw, et cetera.  This is where your deer becomes distinguished.

Now connect the head to the neck using a skewer or one of your wire hangers.  Tape the head to the neck so nothing comes loose.  
Next get your wire hangers ready...They're going to become your highest standing antlers - mold them the way you want them to look and stab them into the head and neck(yikes!) - the farther you can get them in there, the better because they'll be less likely to wiggle around.  If you have lots of wire hangers to get rid of, by all means, use those for the entire antler shape.  If not, use the skewers the same way to become a lower-level antler - you'll be able to build off of those by using either foil or more newspaper molded around the wire/wood forming them into the shapes you need.  I say foil because it tends to be good at grasping on a little better in these intricate areas - you can also create the antlers coming off of the main one with foil a little easier.  

Finally...the messy part: the paper mache paste.  It's super simple.  There are several recipes for this online and any of them will work.  I just used Elmer's glue and water.  Mix them together in a container you can close up...you'll probably want to take breaks in between layers, and your project will need to dry before you can complete the next layer.  Cut tons of newspaper into about 1" thick strips and start wrapping your figure.  I did about 5 or 6 layers at least.  I didn't want my hard work going to waste if my stag fell down.  You'll want him to be strong enough to withstand a little roughness.  

Mossing your Stag...


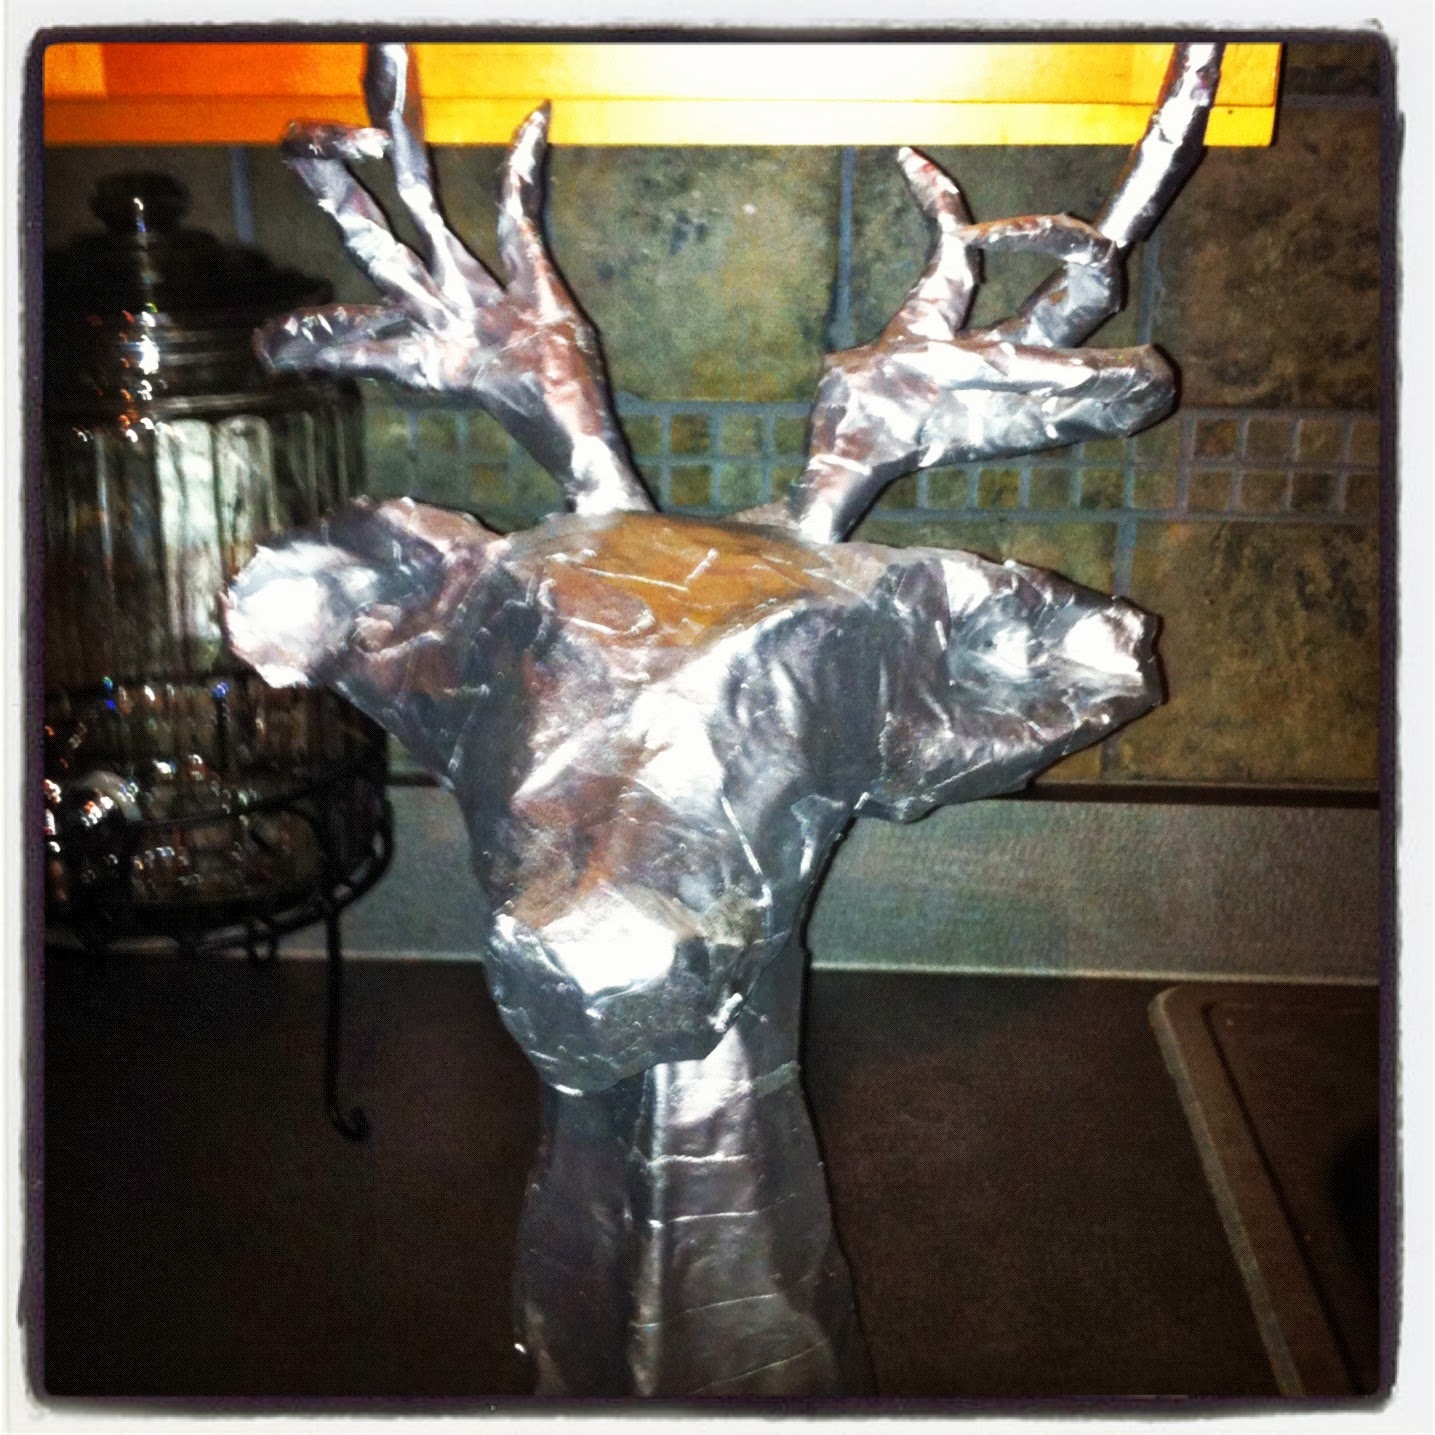
When your project is dry, you've got some decisions to make.  You might like the way it looks with just raw newspaper, you may want to spray paint him white, or metallic silver or gold...Those are all really cool looks and I considered all of them...in fact, I did all of those looks before I decided to go with moss.   

If you decide to go the moss route, begin by cutting pieces of the moss off of the sheet and begin sizing them up against your form. 
*The moss can be found at just about any craft store - I got mine at Hobby Lobby in a roll.  It was $20, but I used my 40% off coupon and got it down to $12 for 6 square feet of moss...plenty to use for several projects in case you get obsessed with mossing like I did!
I found that starting at the base of the neck was the best way to tackle the task.  Use long strips and square or rectangular shapes no larger than 3 or 4" to start.  Be sure to use plenty of glue so the shape of your original form is not lost under the moss.  You might end up using close to a full pack of glue sticks.  

Eventually you'll have most of the surface filled, and you will find that you need to begin some patch work.  The same goes for the antlers.  Here I found that the best tactic was to cut thinner strips and wrap them around each of the antlers, gluing as you go.  

Plenty of moss will fall off of the mat, so it's wise to have newspaper or some kind of sheet laid down to catch it.  I like to use everything...I do my best to not let anything go to waste, so the flakes that fell off were used in covering up the little spots that were not fully covered by the moss mat.  

Whewww...I said it was tedious, didn't I? Here's how mine turned out:


Now all I've got to do is decide where to hang him!

Beer Bread Recipe

So easy to make beer bread!
I really hate grocery shopping.  We go out to eat, or just pick up dinner (or have it delivered) almost every night.  So when Snowpacolypse 2014 hit, I had no milk or bread, of course.  Last night, as I was digging in the pantry trying to put together a meal I noticed the self-rising flour and thought "Oh!  I know how to MAKE bread!"

If you find yourself snowed in and you keep beer in your house, then there's a good chance you can make this bread.

4 Simple Ingredients
Ingredients:
  • 12oz can of beer
  • 3 cups of self rising flour (don't have self-rising flour?  You can add 3 teaspoons of baking powder and 1 teaspoon of salt)
  • 1/4 cup of sugar
  • 1/4 cup of melted butter
Directions:
  1. Preheat oven to 375 degrees
  2. Mix the dry ingredients and beer
  3. Pour into a greased loaf pan
  4. Pour melted butter over the mixture
  5. Bake for 1 hour
It's that easy!  And it's actually really good!

Hopefully this will help you out when you're kicking yourself for not running to the grocery store when you had the chance.  

Saturday, January 25, 2014

DIY Moss Letters

supplies
Making your own moss covered letters is a lot easier than you might think.  

You'll need:

  • - scissors
  • - a pen/pencil
  • - glue gun and glue sticks
  • - sheet of paper to trace letter shape
  • - a letter (I used the thin wood cut out kind - I think it was about $2.49)
  • - moss mat 


6sq ft at Hobby Lobby is $19.99 or $12 with a 40% coupon.  They sell smaller little sheets, but I went with the big one because I figured I would be doing a lot of mossin' around here.

Also, the moss mat comes with some paper on the back.  It's not glued down, it's there so you can trace your shape, but the pen wasn't writing very well on it, so I used a separate sheet of paper.

Step 1- trace the shape on a piece of paper (cardstock would work best) then cut it out
** tip - Learn from my mistakes, add about an extra quarter inch or so to each side, you're going to want to be able to wrap it over the sides so the don't show.

Step 2 - stick the shape to the back of the moss mat and cut it out
** another tip - go ahead and peel back the brown paper and either tape or glue your template so it won't move while you are cutting.

Step 3 - use the glue gun and glue the moss to the wood
You can see in this picture that there were a couple areas that I cut too closely to the template.  If you do this - it's not a big deal.  You can just cut a strip and glue it.  The moss is fairly forgiving.  The seams aren't super obvious.

Finished!
  I'm putting together a rustic Valentine's Day themed mantel.  I'll post pictures once I have it all put together!

Friday, January 24, 2014

DIY Faux Flower Arrangement


floral arrangement foam blocks
I was at Hobby Lobby the other day and got to thinking "peach hydrangeas would really tie the living room together."  I looked around in their floral department, but didn't love any of their faux arrangements.  They do, however, have pretty realistic looking floral stems that you can buy individually.  I have ABSOLUTELY NO experience with floral arrangements.  But I threw caution to the wind and decided to buy a bunch of flowers without looking at the price tags.  I was sweating a little thinking I about how much I was spending and I had no idea if I was going to be able to pull it off.  


Wire cutters
It ended up being pretty easy.  And I think it took me only like 5 minutes.

You will need:

- floral stems 
- wire cutters (scissors might work too)
- a container
- green foam floral blocks (water foam brick)
Step 1.

Cut the stems to the appropriate length (I would do this one at a time as you are placing them)

Step 2.

Stick those suckas down in the foam.  Start with your bigger, main flowers first.

I like things to be symmetrical, so I had three peach hydrangeas, one in the middle and two on each side.


bigger flowers

add in small, filler flowers


Step 3.

Now that you have your main flowers arranged, start filling in with the smaller flowers.
finished arrangement
project in progress - Valentine's Day themed mantel

Wednesday, January 15, 2014

Make your own pillow!


Use a French Silver design for your own arts and crafts project!


Obviously, there's a lot of creative people on Etsy.  From time to time, I have someone tell me that they are using a tea towel for an arts and crafts project.  They like the design, but they want to use it for something else.  I thought it would be fun to share what people are are doing with the towels.

Okay, technically, THIS wasn't a towel.  It was a piece of 18"x18" osnaberg fabric (an inexpensive linen alternative) that I printed our "Drink Up Witches" design onto for my mom.  But hey, you could use our flour sack towel, too.  She added her own Halloween fabric and filled the pillow with plastic grocery bags rather than stuffing because she was leaving it on her screened in porch.  I need to experiment, but I think if you wanted to use a towel, you'd need to line it so the color of the bags doesn't show through.

You can check out our designs and see if there's one you'd like to make into a pillow.  AND, keep in mind, we can do custom printing!  

Friday, February 8, 2013

99 Problems

How to Solve a Problem

I really do have at least 99 problems around here.  We bought this house a little over 2 years ago and we are CONSTANTLY doing some kind of project.  The house was built in 1989 and the previous owners hadn't done much cosmetic work.  What little they did, I've undone because it wasn't my style.  Recently, we ripped out the hideous white laminate countertops and replaced them with gray (marengo) silestone.  There was already a marble backsplash, that I didn't hate, so I decided I needed to just keep it and have the countertops match.  Anyway, so when we ripped the old countertops out there was a section of the old "backsplash" that was attached to part of the cabinets that was extremely stubborn and left some particle board that we can't get off.  The guy who sleeps on the couch and I both went at it for quite a while with a sander and a chisel.  
Before.

This was the best we could get it.  So, it sat like this for months.  Until one day my mom came over.  She and her husband like to come over and point out my 99 problems.  They noticed this one and my mom had a suggestion "You should just cover it up with some cork board or something."  I thought about that for a while.  Figured I'd need to frame it out.  I was just afraid it was going to look like I was masking a problem.  Plus, I wasn't sure how well cork board would hold up next to the cooktop.  It might get gross.  Then, a genius idea hit me.  "Sheet metal!"  I wasn't even sure where to get it, or how much it would cost.  I looked online, but it couldn't really find what I needed.  Then on one of my many trips to Lowe's I decided to see what they had.  Sure enough.  They sell sheets of metal and different grades and sizes.  I bought a 24"x 24" sheet of the cheapest kind (cost me about $11).

After.

Problem solved.  And now I have a magnetic board that can be used to hang recipes as I'm cooking or hold my to do list.  And, most importantly - it can be wiped clean!

It had to be cut down a little.  I'll have to ask they guy who sleeps on the couch what kind of blade he used.  And you need to use self drilling screws so that they can drill through the metal. (See below)


But I think it looks pretty nice.  It blends in nicely, and in my opinion doesn't look like I'm trying to mask a problem.  Yeah, I realize I need to replace that hideous 1989 microwave/oven combo.  That's on my to do list.  But nothing is ever easy around here.  It's not a standard size, just like everything else in this house.  I'm thinking about buying a single wall oven and then a microwave that's meant to go over a range... I saw that on HGTV once.  Thought it sounded like a good idea.


Thursday, February 7, 2013

Behind the scenes

I've been working on getting some new products in my shop.  I like my products to have a farmhouse look, but also have a sense of humor.  This is my latest design:

The pillows that I've been making are time consuming, because I have to cut all the letters out individually so that the blank part of the heat transfer paper doesn't discolor the fabric.  I don't have to do this with the flour sack towels.  Sooo... my latest idea - make pillows out of the flour sack towels.  Here's my trial run.  I should have lined it, though.  The fabric is too thin and shows the fiber fill.  Back to the sewing machine.  

French Silver on Etsy