
DIY Moss Stag Head

Stag heads are a cool and interesting decoration, but they can cost more than $100 for nothing more than a paper mache figure.
I'll be honest, I didn't realize what I was getting into when I started this project - It was one of the more tedious endeavors I have voluntarily took on, but rest assured, it can be done if you take your time and do it right. On the 1 to 10 crafter intensity scale, I'd give this an 8, mostly just because of the time it takes. The up side: there's very little cost...I think mine cost me about $10 - most of the materials you'll have on hand.
What you'll need for the paper mache figure:
-Newspaper (some whole and lots cut into strips)
-Elmer's Glue
-Masking tape
-Scissors
-Wire Hangers
-Wire cutter
-Grilling skewers (the wooden kind)
-Oatmeal canister with cap
-Foil (optional)
What you'll need For the moss covering:
-SuperMoss Instant Green Moss mat
-Glue gun & lots of glue sticks
Where to begin...?
With any paper mache, before you start the messy part, you've got to have a basic form to start on. First off, eat all that oatmeal and clean out the container - keep the top too! You'll use the container as the neck of the deer.
.JPG)
Cut the bottom out and then cut the container from top to bottom, making it more malleable. Mold it into a more conical shape and tape it to stay that way.
Stuff the inside full of balled up pieces of newspaper - a mixture of large and small...you just want the whole thing filled up. The top of the container will become the base of the neck - use extra balled up newspaper to slide in between the cone and the base (or the oatmeal cap). Next, make a snake-like figure out of newspaper. As we all know, not all necks are perfectly conical. Deer have a peak at the front of their necks. Tape it on to the front of the neck shape. Don't worry about making your figure perfectly smooth. Remember, you're going to be adding a smooth paper mache finish over this...all you're doing right now is creating the raw shape.
***IMPORTANT***: I didn't have the hindsight here, but I can give the advise now. If you're planning on mounting the stag, be sure to hold your unfinished project up to the wall with the base flush with the wall. You don't want his head hanging too low - make him look happy and regal...a low-hanging head will make him look sad and ashamed - you want your art to look the way you feel about it...proud!
Start forming a head shape with your newspaper. I found that this step is a lot of trial and error. Maybe you'll have to create the snout separate from the head and tape them together. Don't forget about your tape here either way...it's great for shaping. Be sure to pay close attention to nostril indentations, eye contour, ears, jaw, et cetera. This is where your deer becomes distinguished.
Now connect the head to the neck using a skewer or one of your wire hangers. Tape the head to the neck so nothing comes loose.
Next get your wire hangers ready...They're going to become your highest standing antlers - mold them the way you want them to look and stab them into the head and neck(yikes!) - the farther you can get them in there, the better because they'll be less likely to wiggle around. If you have lots of wire hangers to get rid of, by all means, use those for the entire antler shape. If not, use the skewers the same way to become a lower-level antler - you'll be able to build off of those by using either foil or more newspaper molded around the wire/wood forming them into the shapes you need. I say foil because it tends to be good at grasping on a little better in these intricate areas - you can also create the antlers coming off of the main one with foil a little easier.
Finally...the messy part: the paper mache paste. It's super simple. There are several recipes for this online and any of them will work. I just used Elmer's glue and water. Mix them together in a container you can close up...you'll probably want to take breaks in between layers, and your project will need to dry before you can complete the next layer. Cut tons of newspaper into about 1" thick strips and start wrapping your figure. I did about 5 or 6 layers at least. I didn't want my hard work going to waste if my stag fell down. You'll want him to be strong enough to withstand a little roughness.

Mossing your Stag...
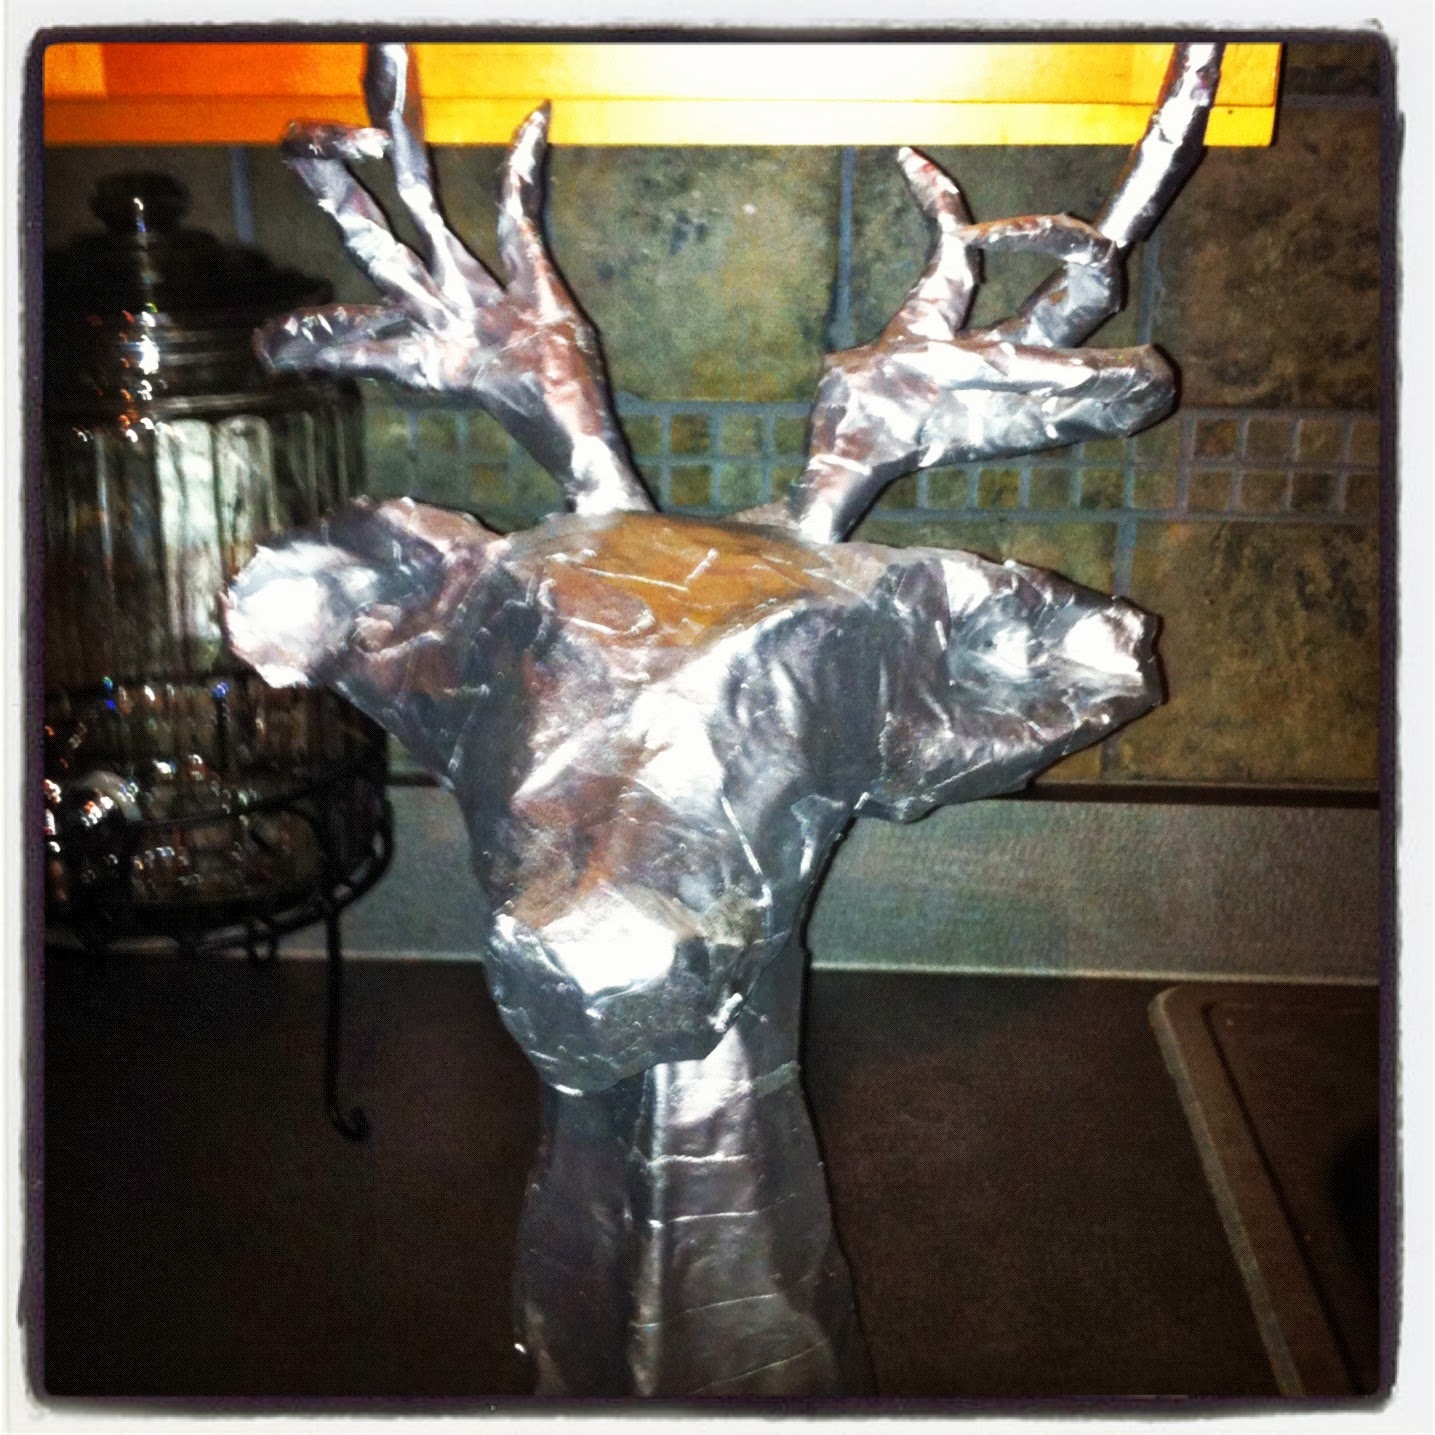 When your project is dry, you've got some decisions to make. You might like the way it looks with just raw newspaper, you may want to spray paint him white, or metallic silver or gold...Those are all really cool looks and I considered all of them...in fact, I did all of those looks before I decided to go with moss.
 If you decide to go the moss route, begin by cutting pieces of the moss off of the sheet and begin sizing them up against your form.
*The moss can be found at just about any craft store - I got mine at Hobby Lobby in a roll. It was $20, but I used my 40% off coupon and got it down to $12 for 6 square feet of moss...plenty to use for several projects in case you get obsessed with mossing like I did!
I found that starting at the base of the neck was the best way to tackle the task. Use long strips and square or rectangular shapes no larger than 3 or 4" to start. Be sure to use plenty of glue so the shape of your original form is not lost under the moss. You might end up using close to a full pack of glue sticks.
Eventually you'll have most of the surface filled, and you will find that you need to begin some patch work. The same goes for the antlers. Here I found that the best tactic was to cut thinner strips and wrap them around each of the antlers, gluing as you go.
Plenty of moss will fall off of the mat, so it's wise to have newspaper or some kind of sheet laid down to catch it. I like to use everything...I do my best to not let anything go to waste, so the flakes that fell off were used in covering up the little spots that were not fully covered by the moss mat.
Whewww...I said it was tedious, didn't I? Here's how mine turned out:
.JPG)
.JPG)
Now all I've got to do is decide where to hang him!


No comments:
Post a Comment